Nowadays, security of our data has become a must that hunts us all. Many many ways are availiable on protecting our private data and hiding our files from others. The way everybody thinks about, when talking about security, is cryptography. But do you know that it is not the only way around?
It is true that encrypting our data is among the most secure ways of keeping them safe. But there is another way, less secure, but in some ways more convienient and, i must admit, very smart. It is steganography. I will quote a definition of Steganography from wikipedia.
Steganography is the art and science of writing hidden messages in such a way that no one apart from the sender and intended recipient even realizes there is a hidden message. By contrast, cryptography obscures the meaning of a message, but it does not conceal the fact that there is a message. Today, the term steganography includes the concealment of digital information within computer files. For example, the sender might start with an ordinary-looking image file, then adjust the color of every 100th pixel to correspond to a letter in the alphabet — a change so subtle that someone who isn’t actively looking for it is unlikely to notice it.
As you can see, the basic difference with cryptography is that steganography hides the data instead of obscuring them. That is not so good since if someone finds out the algorithm of how we hide the data then he can easily find the original message. Cryptography, is not based on hiding the algorithm but actually hiding the internal state of the machine that is encrypting.
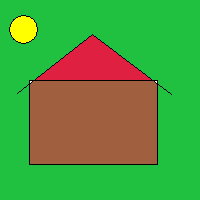
From the definition i got from wikipedia, as you can see, it also suggests a way of steganographing our data. It says, on an image, each 100th pixel we can add info about our data. This is a way. But here i will show you how i did the job. First of all i created a 200 by 200, 256bit bitmap file.
I know, my painting skills are awfull, but this is not the point now. This file is a .bmp file with a 256bit color pallete. The bitmap file specification (for which i intend a future blog post, since it is interesting) says that the file starts with some headers and then the data follow in reverse order. This means that the top most left pixel is stored on the last byte of the file.
Here let me say that if you want to follow this tutorial better then a hex editor is what you will need for sure. I suggest xvi32. With this one, you will be able to open the bitmap files and see them in hex. If you have another one that you like then suit yourself 🙂
So, if you open the above image with a hex editor, the image data are held beyond the address 435 (in hex or 1077 in dec). Try changing some of the pixels to “FF”. You will start seeing white pixels appearing on the bottom right corner. As i mentioned before, the data are stored in a reversed order so if you change the first byte that appears after the header then the bottom right pixel should be affected. If you want you can change the last bytes, this way the top left pixels will change. Try experimenting a little it is fun…
Let’s take a closer look at the first bytes of the bitmap in hex. Following is an image from my hex editor. Included in the red border are the bytes that are after the 435hex address.

The hex value 71hex (113 in dec) is the color code for that pixel. The first 71 is the bottom right pixel of the image. In binary it is “1110001”, or as an octet (eight bits) it is “01110001”. Let’s keep this in mind.
Now, let’s say we have a file having the following text: “this is a text that we need to encode!!”. All we want to do is hide this text in this image. First things first. Lets see the hex, and most important, the binary code of this sepcific text.
74   68   69   73   20   69   73   20   61   20
74   65   78   74   20   74   68   61   74   20
77   65   20   6e   65   65   64   20   74   6f
20   65   6e   63   6f   64   65   21   21
And the binary….
01110100    01101000    01101001    01110011    00100000
01101001    01110011    00100000    01100001    00100000
01110100    01100101    01111000    01110100    00100000
01110100    01101000    01100001    01110100    00100000
01110111    01100101    00100000    01101110    01100101
01100101    01100100    00100000    01110100    01101111
00100000    01100101    01101110    01100011    01101111
01100100    01100101    00100001    00100001
All you see above is the hex and binary of the text that we said. Now how can we squize these data into our image? Well, as we saw in the definition above, one way is to change the data of each 100th pixel and add the data of the file to be hidden. I think this is a very expensive way because if we have a very large file to hide we would need a very very very large image file to hide it in…
The way i chose to try to hide my data is this. I have to hide 39 characters * 8 bits each one, a grant total of 312 bits. I thought that if i get the binary representation of each pixel and change the least significant bit to one of my data’s then i would need 312 pixels. The change on the image’s pixels would be that of at most a tone. We have this possibilities:
 It is      We make it      Change
  0               0            no change
  0               1            a tone
  1               0            a tone
  1               1            no change
Let’s explain. When i say we have no change, i mean…. we have no change 🙂 There is no change whatsoever on the pixel’s colour. When i say there is a change on a tone i mean that the pixel’s colour will be darker or lighter by one tone. This, to an eye is not noticable, even if you know what you are looking for. Some might say “i will notice” but hold your horses and you shall see.
So, i created a small java program that actually encodes the data into the image file, after the 435hex address. Following is a java code snippet that does that.
private void encode(String inFile, String outFile) throws Exception{
	int[] openFile = loadFile(inFile);//method load file actually reads a file to an int array as bytes.
	int[] image = loadFile(outFile);
	//checking if the open file fits in the image
	if((openFile.length * 8) > (image.length - 1077)){//1077 is the header of the bmp
		System.out.println("The file does not fit in the image....");
		return;
	}
	int outCur = 1078;//starting of the bitmap data after the header.
	/*
	* for each byte we want to encode, we transform it to a bit octet and then for each bit
	* we get a byte of data from the target image and we substitute the last bit with the bit
	* from the file to be encoded...
	*/
		for(int i=0; i
With this small java method we do what i described above. I get all the bits from the text to be encoded and “hide” them into my image. The file to be hidden can be anything. From text file to an image or any binary such as an mp3! The only constraint is that the target image should be large enough to “squize” it in. When we say large enough, for this method, we mean “pixels > bits of the file to be encoded“.
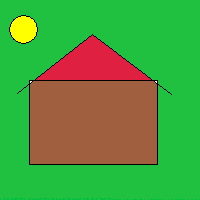
Now, let’s see what we did. I took the image innocent looking image above and hidden inside the text “this is a text that we need to encode!!“. The image below is the one with the hidden data in it.
Well now, impressive huh? Can you see any change? It should be on the bottom right pixels but… there is none that i can see of. I am almost sure i am not convincing enough. So as an evidence here is the hex code of the same addresses i illustrated before.

As you can clearly see it has changed. But, the changes are so tiny the eye is not capable of catching. Now, i dare you to download both files and see for your self.
From now on, sky is the limit. One problem one would face with this kind of steganographing your data is this. When you want to decode, how do you know where your hidden file’s data stop? What i mean is, we used, as explained above, 312 pixels of the image to hide our data. But how would we know that when decoding? There are many solutions, among them is that we could add a delimiter on our data specifying the end of our file.
All in all, what we did here, is that we took a text file and hid it in an image file. It is important to say here that first of all i used a bitmap file and not a JPEG or any other image type. This is because bitmap files are uncompressed files. This means that all the pixels have their colour codes. This does not mean that we cannot do it with a JPEG image but, aside the fact that this is beyond the scope of this post, i have no idea on how JPEG works and there is no meaning on finding out for now. If you try to search the market for steganography programs, i am sure, you will find plenty. One that i found is krypt-x.
One thing that i must make sure you got it right is that stenography is not the ultimate way to secure your data. If someone knows that a file contains hidden data along with the algorithm he can extract them. So, if you want to make sure you are safe, use cryptography. Or, even better, encrypt a file and then hide it into another. That’s security mania but it is safe.
Finally, i created a small class for me to be able to see easily binary and hex code of files. Here it is. You need to have JDK 1.6. When you compile, try “java BinaryReader mode file”, where mode is hex or bin.

